An appointed attorney using the services of an associate attorney may
add claims for services and expenses to their own CJA 20/30. To do this,
the appointed attorney must contact the court or federal defenders office
to ensure the associate attorney is set up in eVoucher and to have the
associate attorney added to the appointment. Once this is done, an attorney
having an associate on their appointment may add associate services and
expenses to a CJA 20/30 and submit together with their own services and
expenses on the same voucher.
|
|
1 |
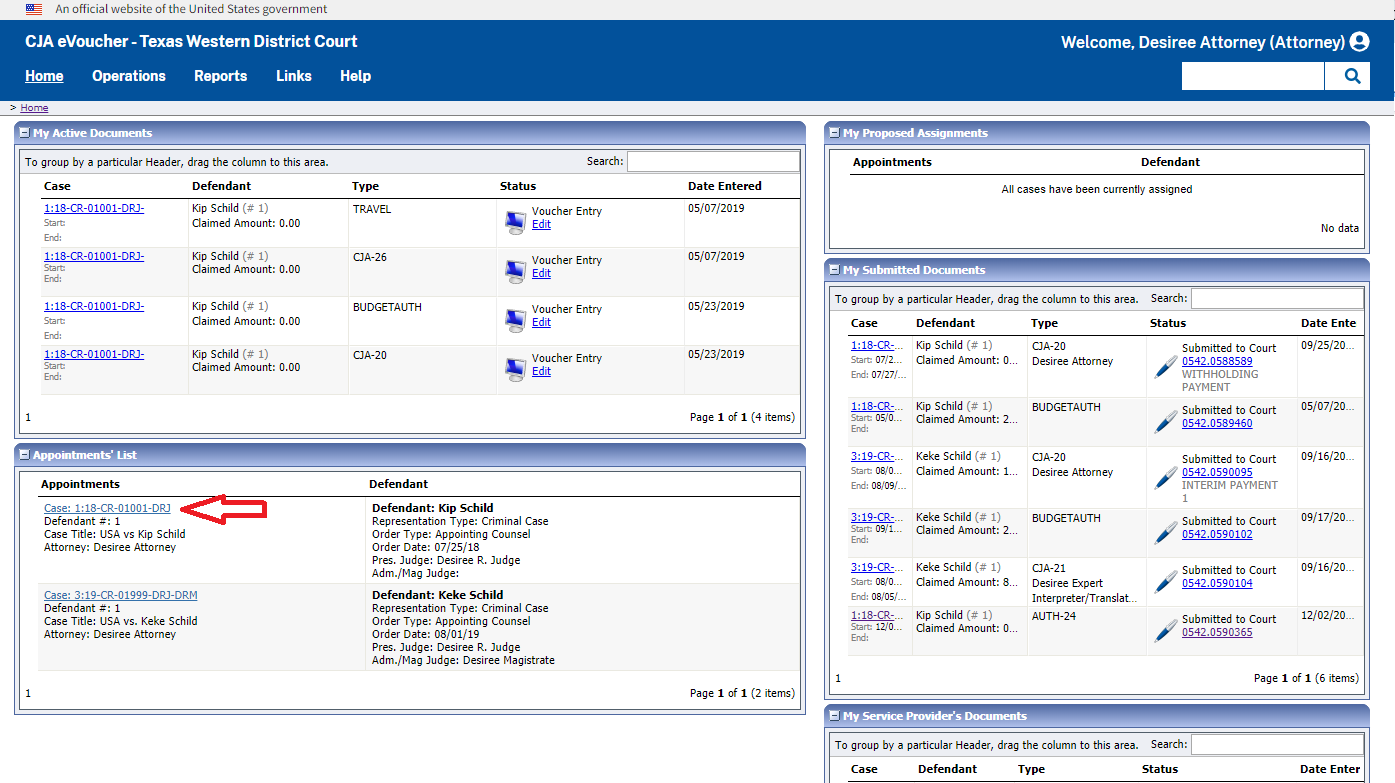
On the Home
Page, select a case from the Appointments
List grid.
|
2 |
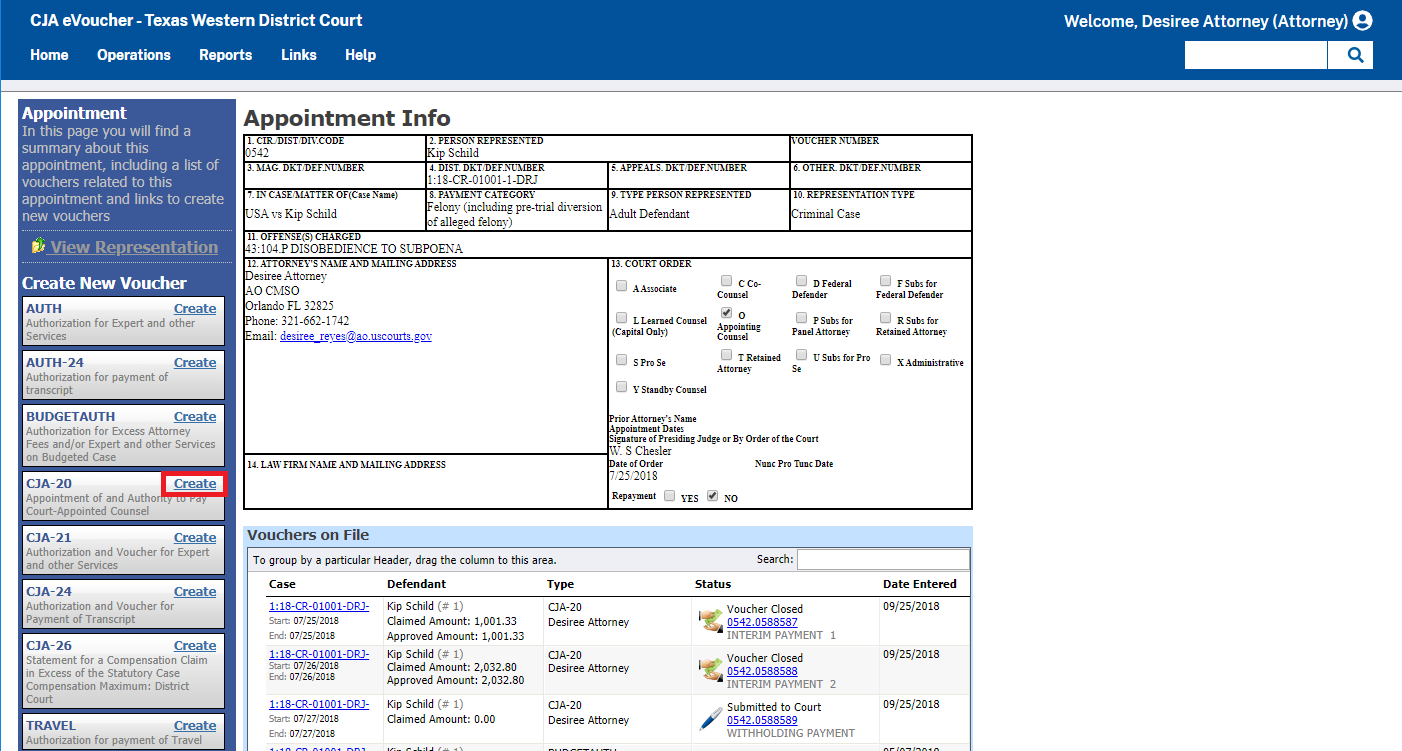
Click Create
next to CJA 20 (or CJA
30 if the case is a Capital Case).
|
3 |
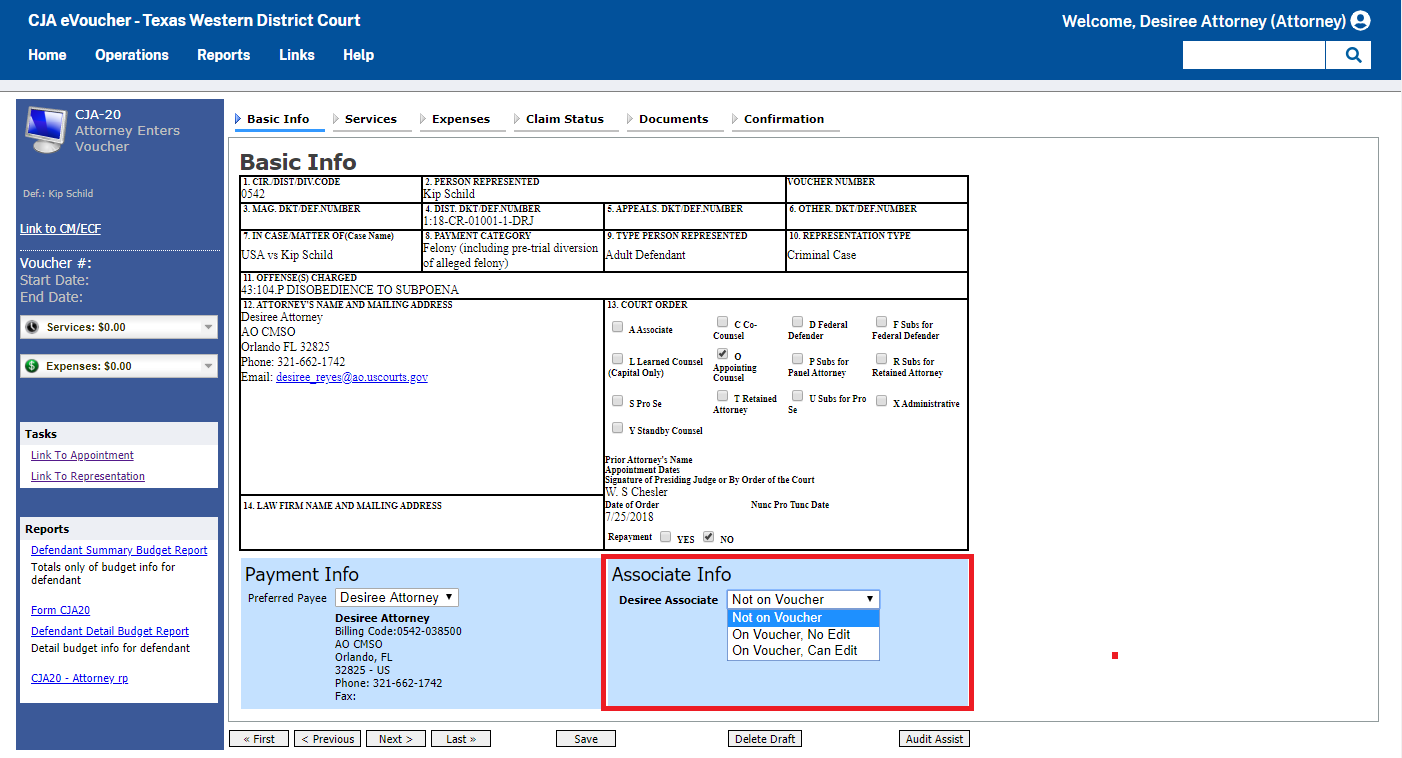
On the Basic
Info tab, in the Associate
Info section, select the level of access to this voucher
that the associate attorney will have, if any.
NOTE:
For information on importing associate attorney services into
a CJA 20/30, see the topic Import
Service Entries.
| Option |
Description |
Not on Voucher (Default) |
This voucher does not include
any claims for services and/or expenses for the associate
attorney. |
On Voucher, No Edit |
This voucher includes claims for
services and/or expenses for the associate attorney. While
the voucher is in Voucher Entry mode, the associate will
have read-only access to view only their own entries on
this voucher. Only the appointed attorney will be
able to add, remove, edit, and save entries on behalf
of the associate. |
On Voucher, Can Edit |
This voucher includes claims for
services and/or expenses for the associate attorney. While
the voucher is in Voucher Entry mode, both the appointed
attorney and the associate will have the ability to add,
remove, edit and save only their own entries on this voucher. |
NOTE:
Payment for this voucher will go to the Preferred Payee selected
Payment Info section.
|
4 |
After selecting On
Voucher, No Edit or On
Voucher, Can Edit, click on the Services
tab to enter service claims for either the appointed attorney
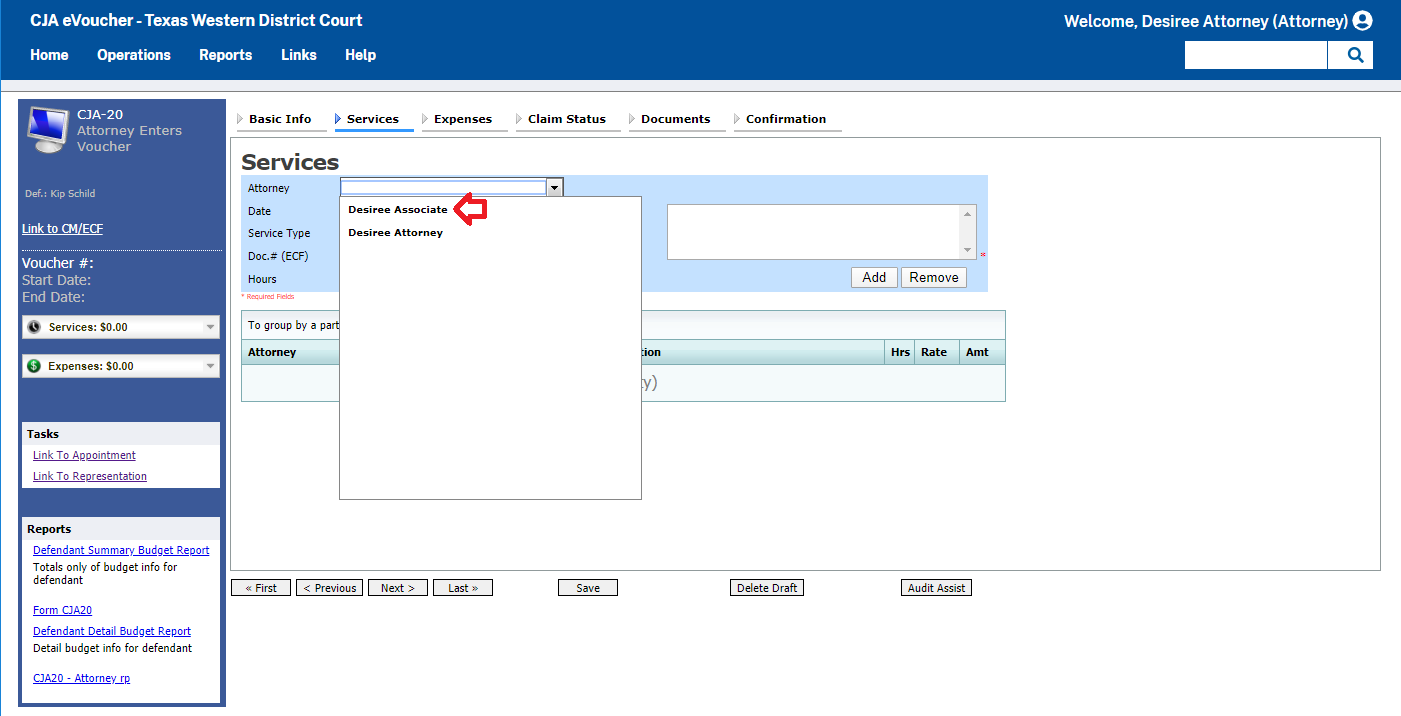
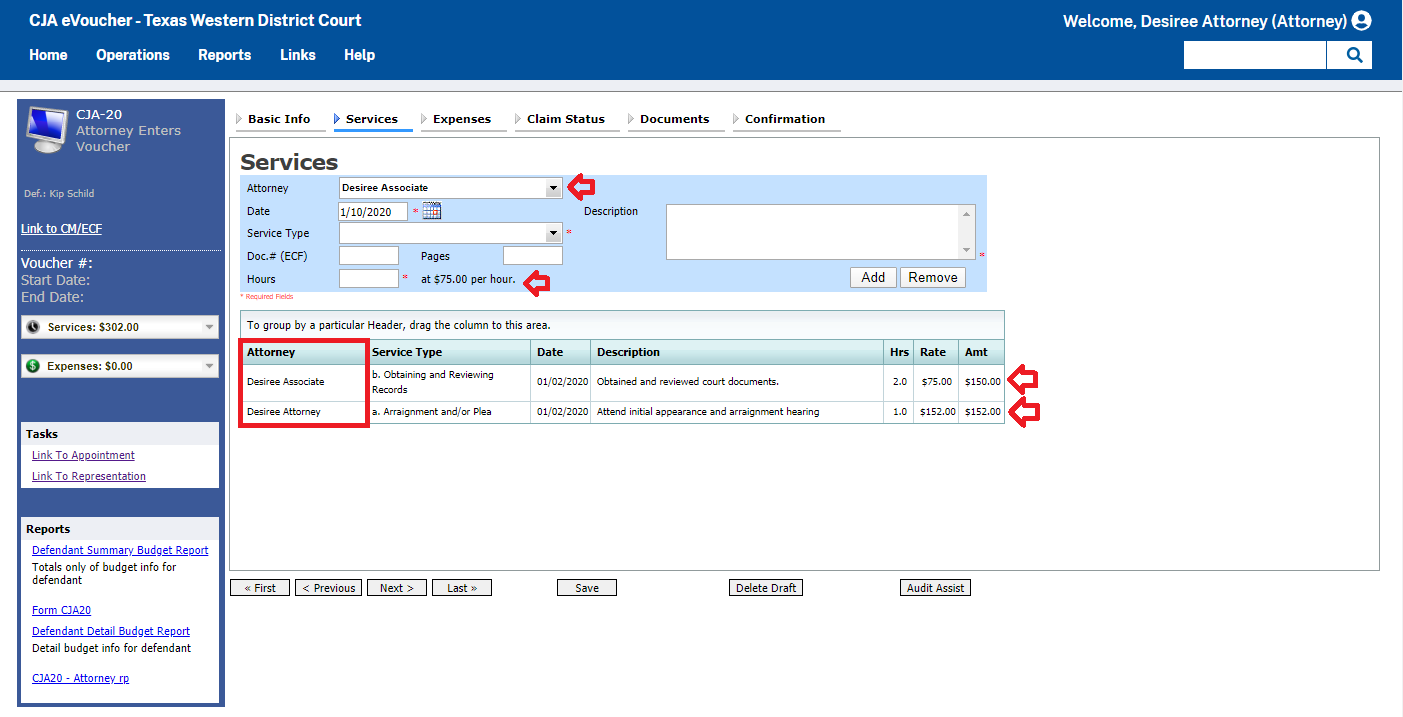
or the associate. The Services
tab will include an additional Attorney
drop-down field. If no selection is made on the Attorney
drop-down field, then service entries added to the voucher will
be for the appointed attorney. To enter a service claim
for the associate, select the associate's name in the Attorney
drop-down.
|
5 |
Entries added for the associate will be
added at the rate entered by staff when the associate was added
to the appointment. The rate may be at or below the statutory
hourly rate. Service entries for the appointed attorney
will appear at the statutory rate (non-capital or capital). The
Attorney column in the grid indicates for whom each line item
applies.
|
5 |
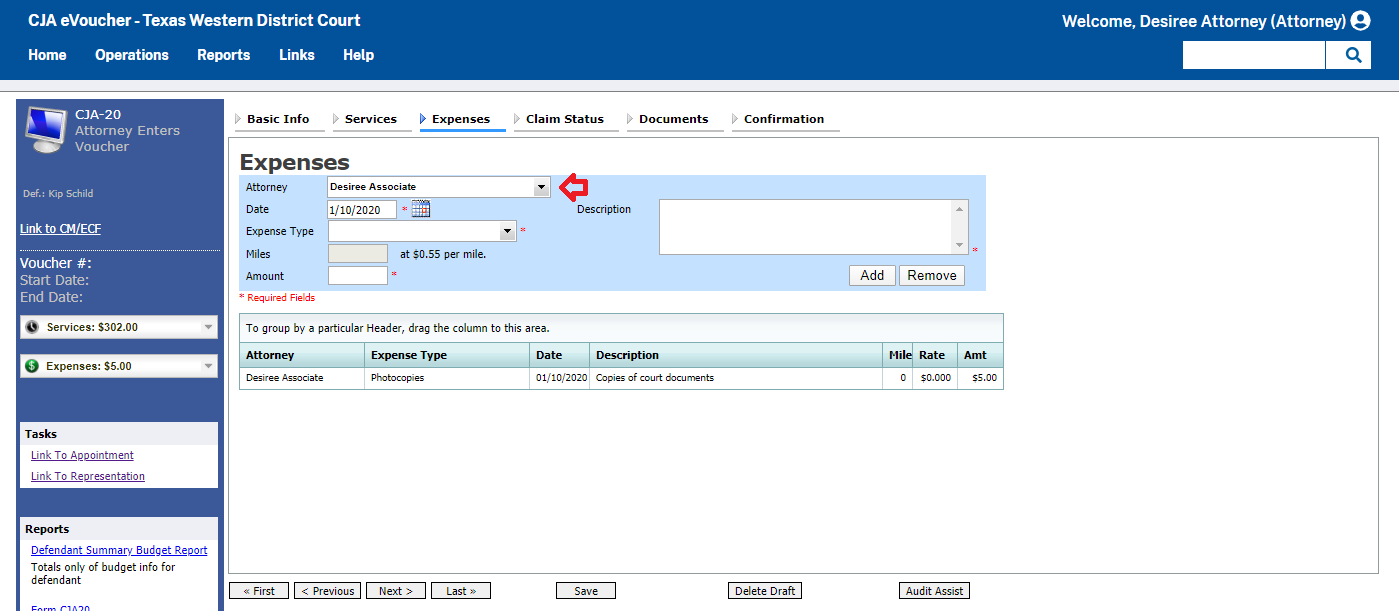
On the Expenses
tab, if no selection is made in the Attorney
drop-down, then expense items will be added for the appointed
attorney. To apply the expense to the associate, select
the associate's name in the Attorney drop-down field.
|
6 |
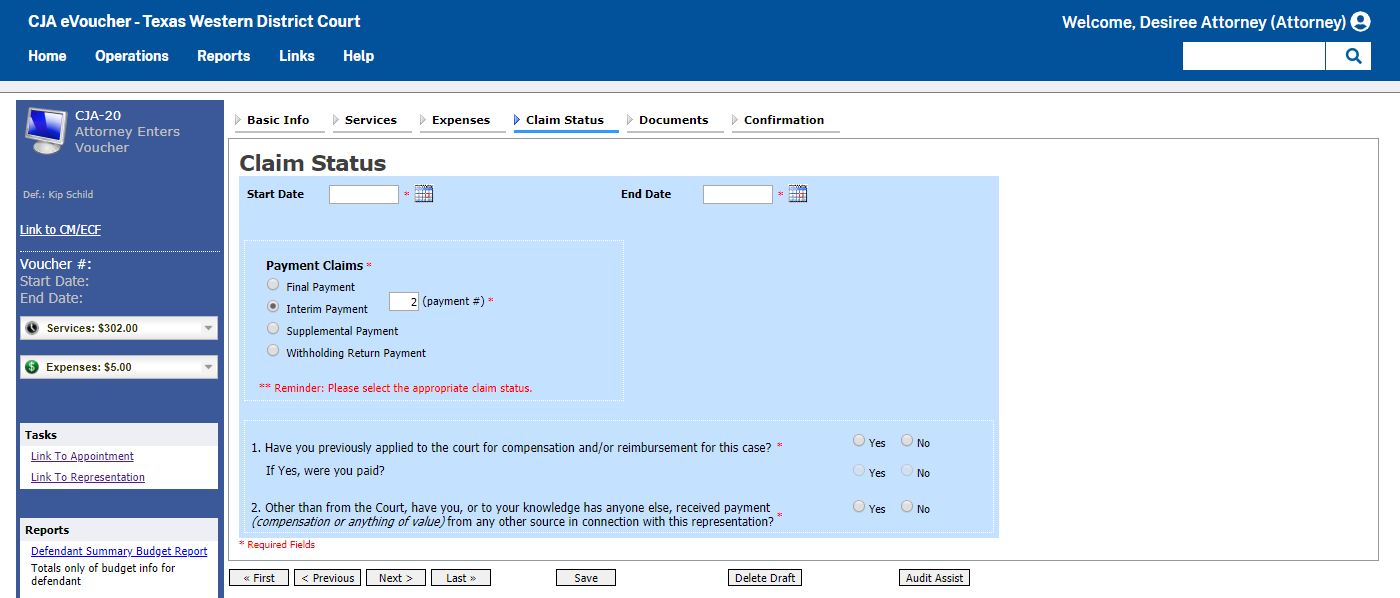
Click on the Claim Status
tab to view the start and end dates of the voucher and other information,
if entered by the appointed attorney when viewing. This
tab is always read-only for the associate.
|
7 |
When all entries for services and/or expenses have been
added to the voucher, click on the Claim
Status tab and complete the required fields, submit supporting
documentation on the Documents
tab in PDF format, if any, then click on the Confirmation
tab, to Submit the voucher
to the court.

|
|
|
1 |
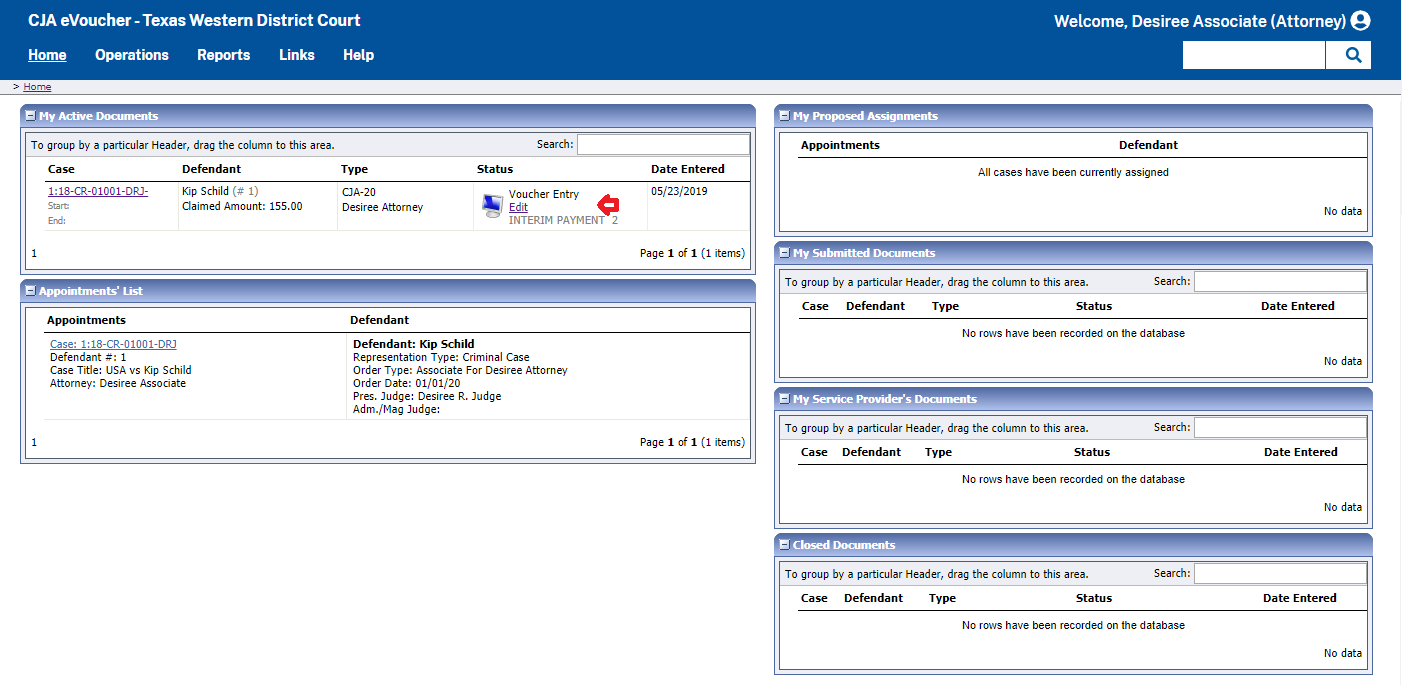
Log into eVoucher, and in the My
Active Documents, click Edit
next to the voucher in Voucher Entry status.
Note:
Associate appointments will appear in the Appointments List grid
with the Order Type of
Associate For
(the
appointed attorney's name).
Only the appointed attorney can create vouchers.
|
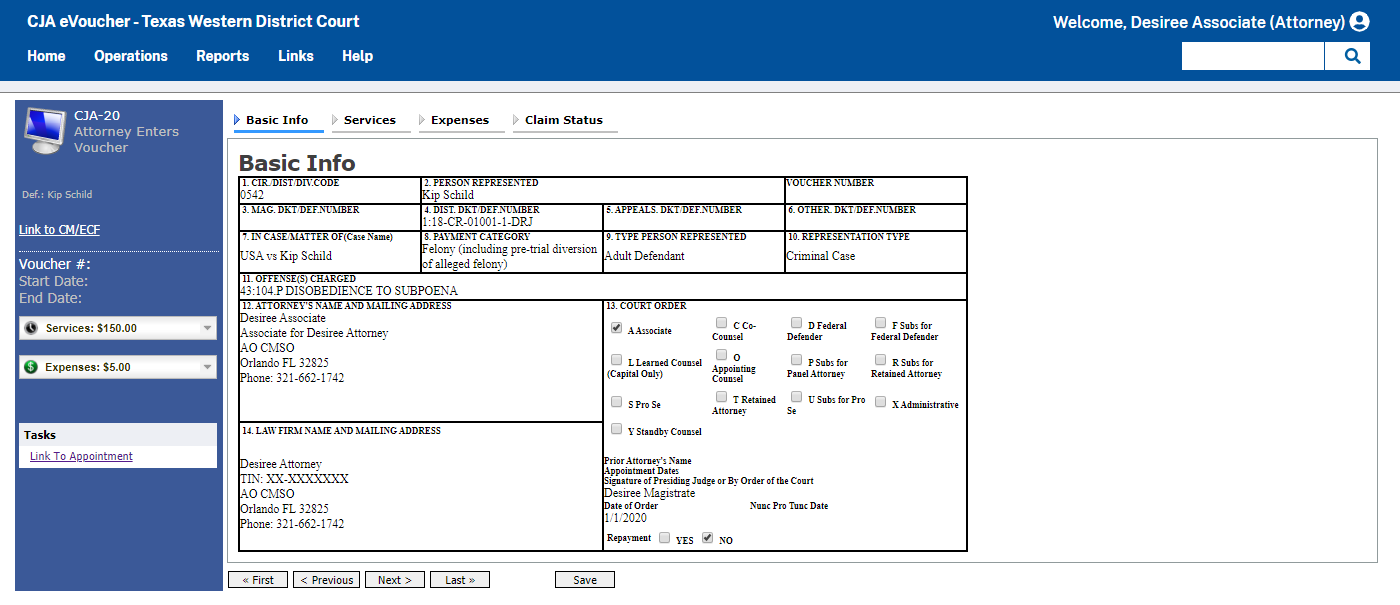
2 |
The Basic
Info tab contains read-only information about the case
and appointed attorney.
Note:
Documents may only be uploaded and the voucher submitted by the
appointed attorney, therefore, the voucher does not include the
Documents or Confirmation tabs when viewed by the associate.
|
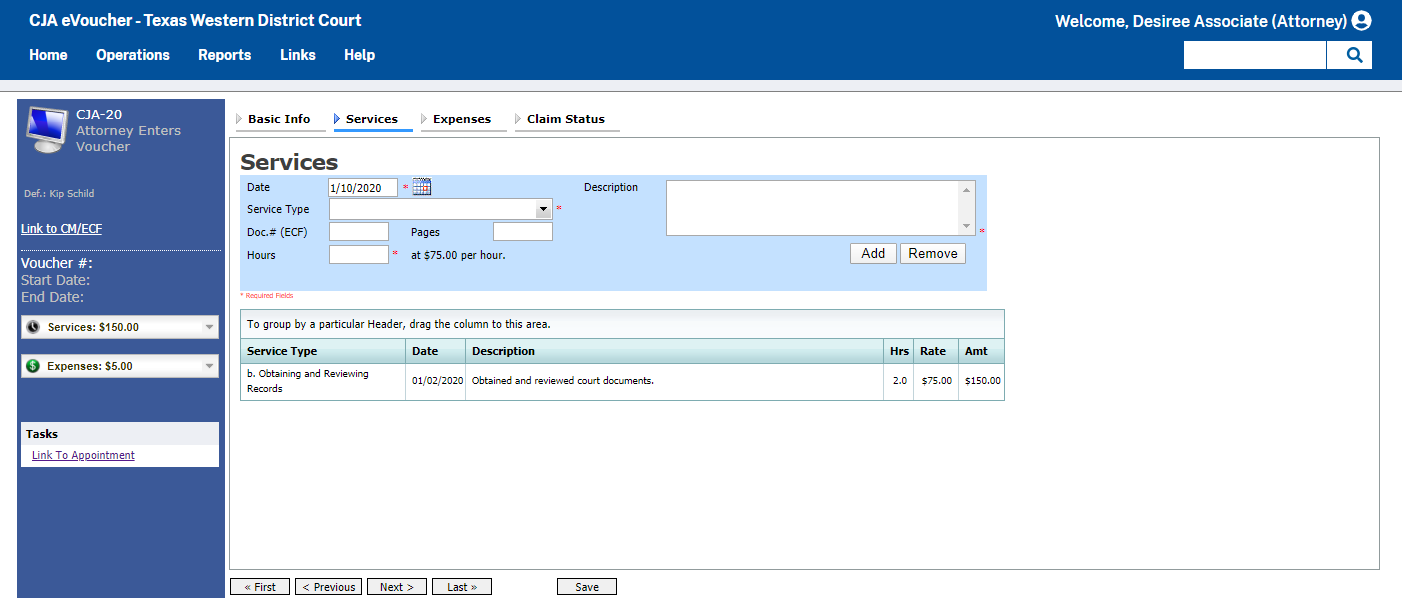
3 |
Click on the Services
tab to add services. Complete the required fields and click
Add.
|
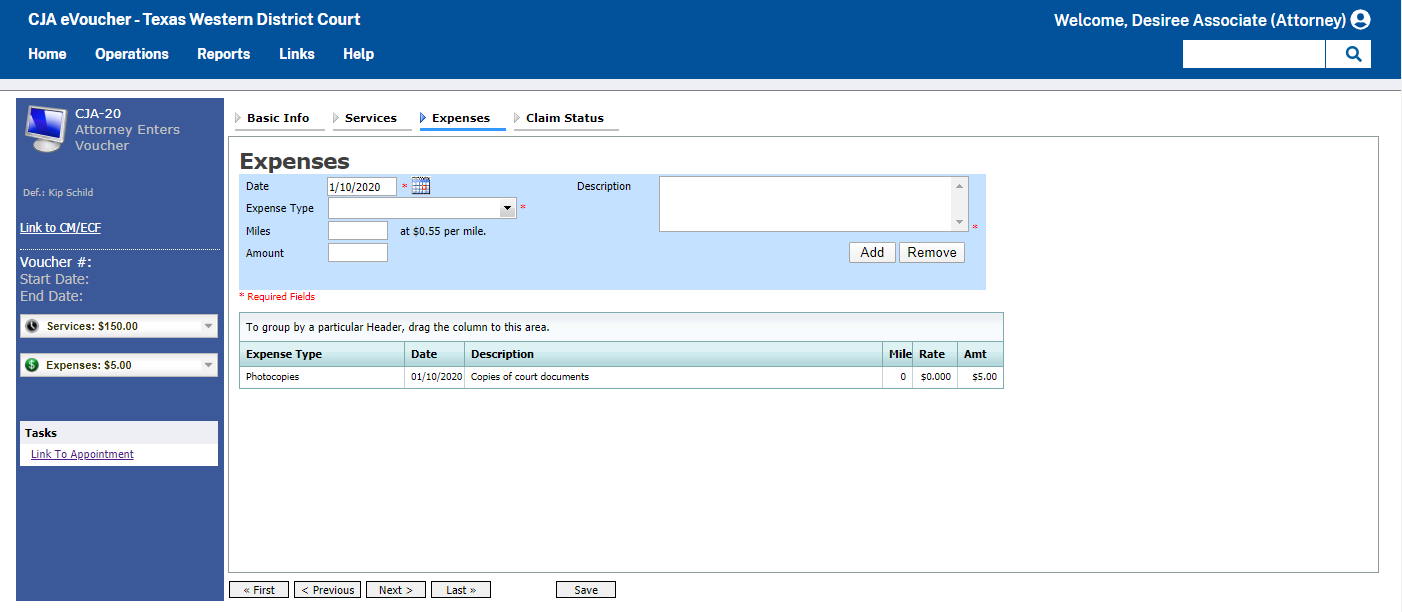
4 |
If there are expenses to be claimed, click
on the Expenses tab. Complete
the required fields and click Add.
|
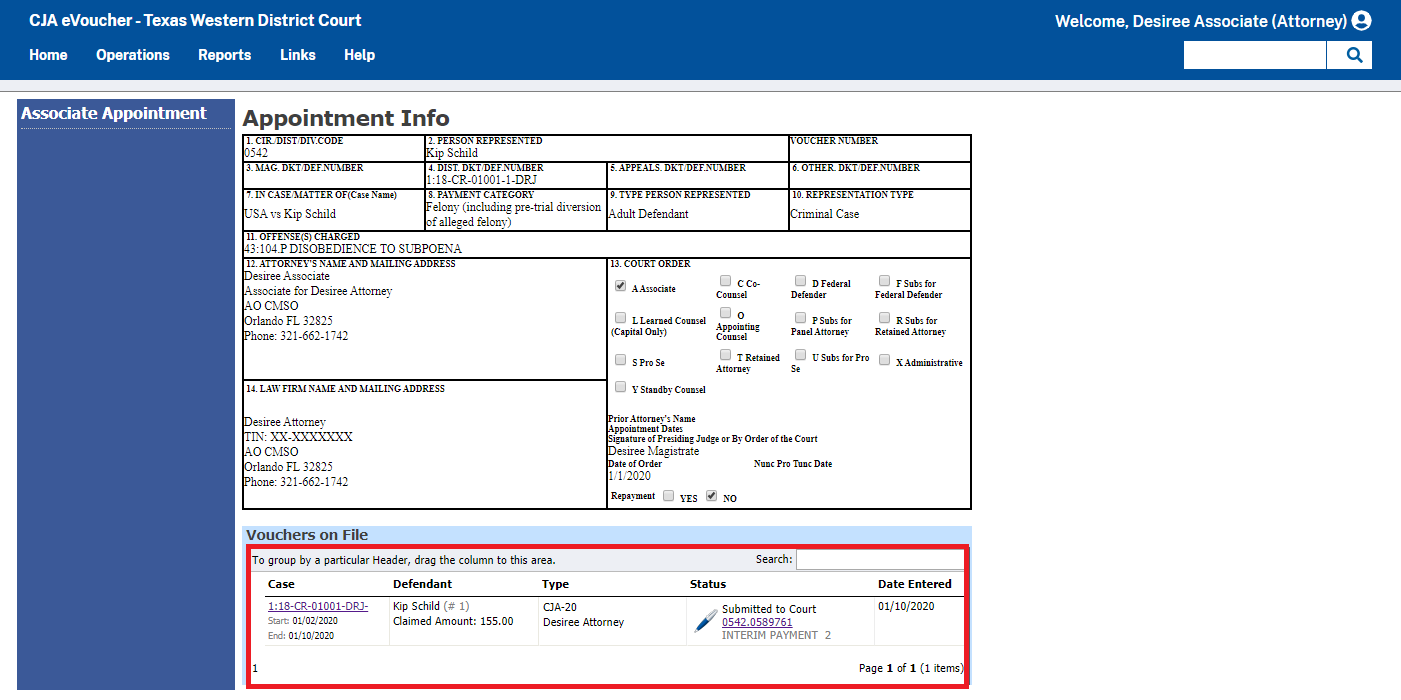
5 |
When all Service
and Expense items have
been added to the voucher, click Save.
The appointed attorney will submit the voucher to the court
when ready. After the voucher is submitted to the court,
it may still be accessed from the Appointment
Info page, but will be read-only. To access the Appointment Info page, either
click Link to Appointment
from the voucher page, or access the appointment from the Home screen.
Note:
Associates can only see their own claims and claimed amounts on
the voucher. Only the appointed attorney can view the entire voucher
with combined entries.
|
|
|
1 |
Log into eVoucher, and in the My
Active Documents, click View
next to the voucher in Voucher Entry status.
Note:
Associate appointments will appear in the Appointments List grid
with the Order Type of
Associate For
(the
appointed attorney's name).
Only the appointed attorney can create vouchers.

|
2 |
The Basic
Info tab contains read-only information about the case
and appointed attorney.
Note:
Documents may only be uploaded and the voucher submitted by the
appointed attorney, therefore, the voucher does not include the
Documents or Confirmation tabs when viewed by the associate.

|
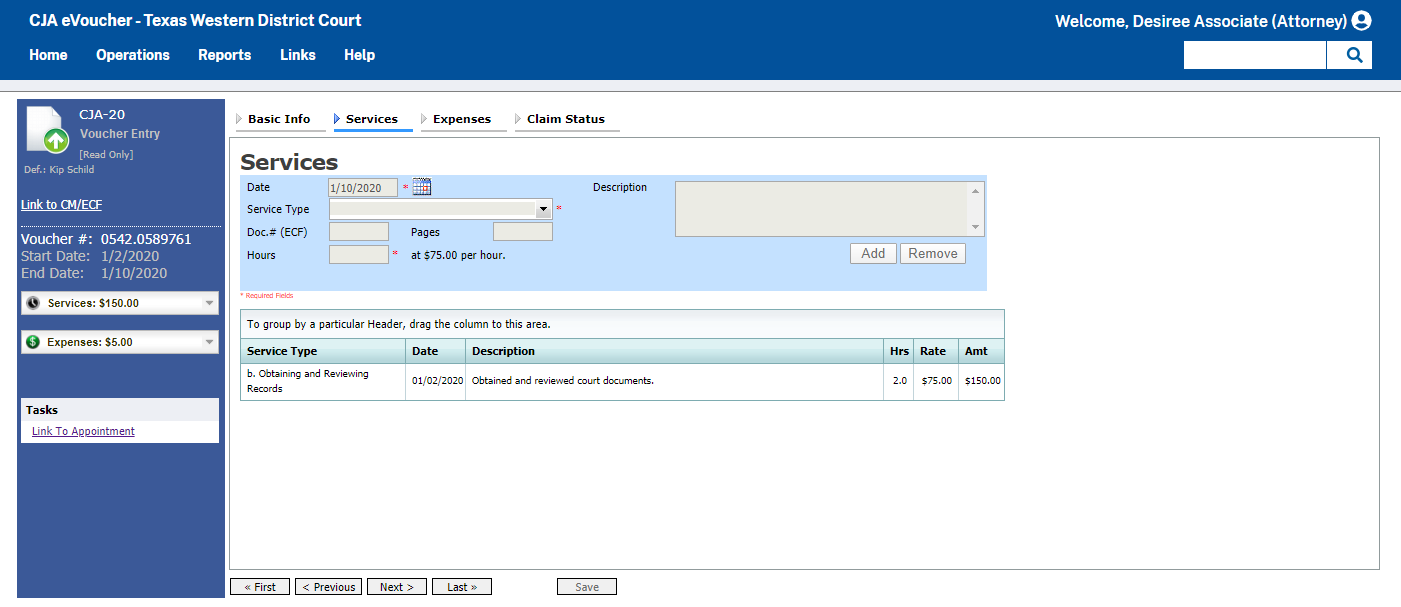
3 |
Click on the Services
tab to view entries added to the voucher by the appointed attorney.
Observe that the entries are read-only and the Save button is
disabled.
|
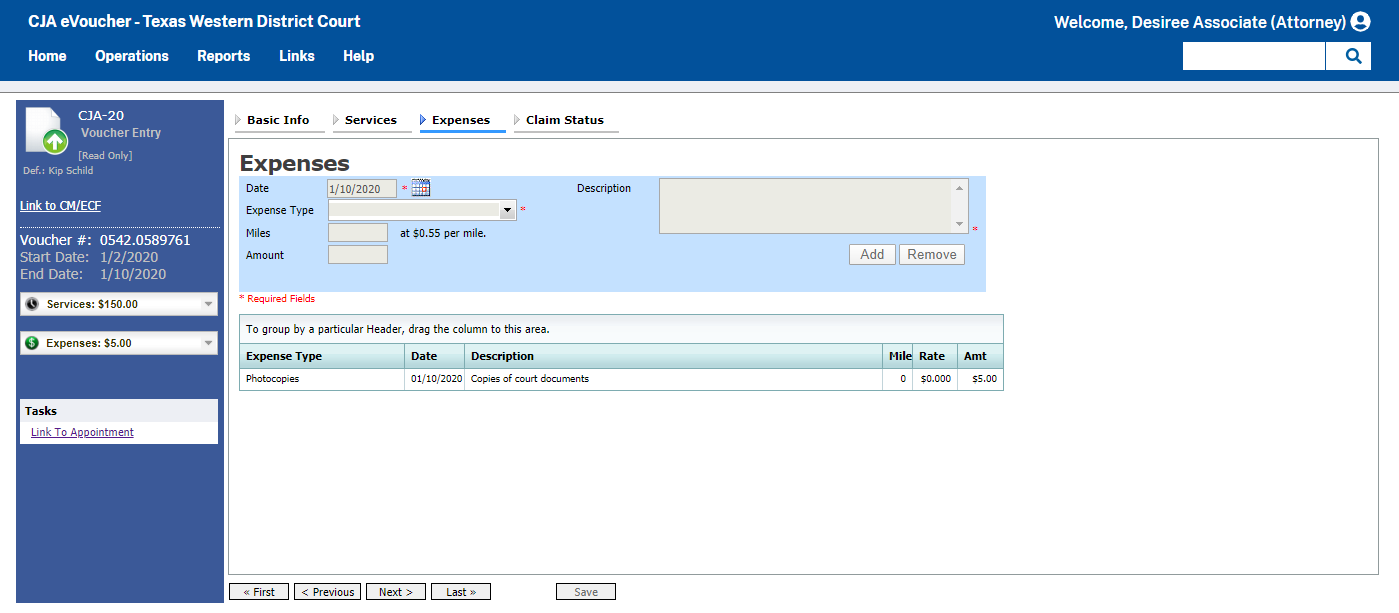
4 |
Click on the Expenses
tab to view entries added to the voucher by the appointed attorney,
if any.
|
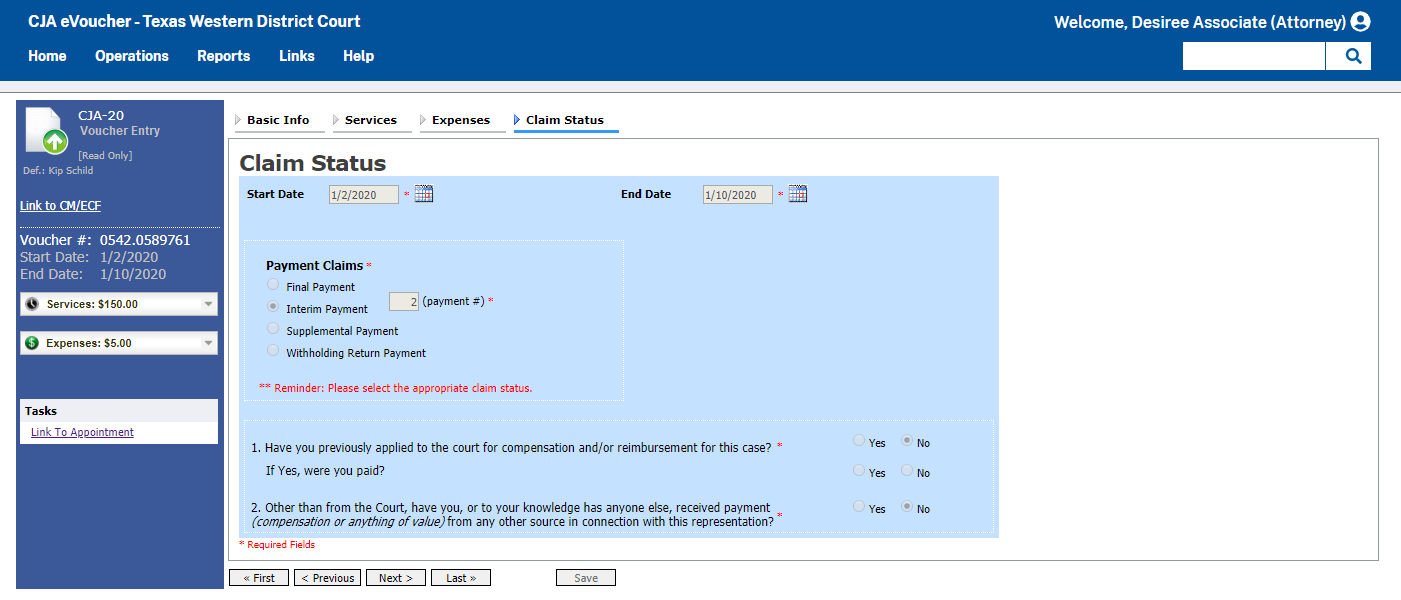
5 |
Click on the Claim
Status tab to view the start and end dates of the voucher
and other information, if entered by the appointed attorney when
viewing. This tab is always read-only for the associate.
|
6 |
The appointed attorney will submit the
voucher to the court when ready. After the voucher is submitted
to the court, it may still be accessed from the Appointment
Info page, but will be read-only. To access the Appointment Info page, either
click Link to Appointment
from the voucher page, or access the appointment from the Home screen.
Note:
Associates can only see their own claims and claimed amounts on
the voucher. Only the appointed attorney can view the entire voucher
with combined entries.

|


